Script: Timed Theme Texture Change for Props
Documentation · Timed Theme Texture Change for Props
Follow these directions carefully. Complete the Step by Step Guide in the first place and then go to the Advanced Setup section for a detailed explanation of all the features. There's a Troubleshooting section at the end. Before asking for help, check that your problem isn't one of the problems described in there.
License of Use: Click here to read the License of use.
What's included in your purchase
Check that your box contains the following assets:
- [Black Tulip] Timed Theme Texture Change for Props
- [Black Tulip] Timed Theme Texture Change for Props ~CFG~
- [Black Tulip] Timed Theme Texture Creator for Props - AUX TOOL
- [Black Tulip] Do Not Texture This Side
- [Black Tulip] Proof Of Purchase - Timed Theme T.Change Props v1
- [Black Tulip] SAMPLE - Marshmallow
- [Black Tulip] SAMPLE - Marshmallow State 0 - BAKED
- [Black Tulip] SAMPLE - Marshmallow State 1 - BAKED
- [Black Tulip] SAMPLE - Marshmallow State 2 - BAKED
- [Black Tulip] SAMPLE - Marshmallow - READY
- [Black Tulip] SAMPLE - Glass - 01 - Empty
- [Black Tulip] SAMPLE - Glass - 02 - SemiFull 1
- [Black Tulip] SAMPLE - Glass - 03 - SemiFull 2
- [Black Tulip] SAMPLE - Glass - 04 - Full
- [Black Tulip] SAMPLE - Glass - 01 - Empty - BAKED
- [Black Tulip] SAMPLE - Glass - 02 - SemiFull 1 - BAKED
- [Black Tulip] SAMPLE - Glass - 03 - SemiFull 2 - BAKED
- [Black Tulip] SAMPLE - Glass - 04 - Full - BAKED
- [Black Tulip] SAMPLE - Glass - READY
- [Black Tulip] SAMPLE - Glass - READY & FIXED
- [Black Tulip] Timed Theme Texture Change for Props ~DOC~
If any of these is missing, contact Auryn Beorn for a replacement.
Features list
- Textures change for materials and non materials objects
- Themes are applied after a specified number of seconds
- Define if it's a rezzable prop or an attachment
- Includes auxiliary tool to create the themes
Step by Step Guide
Out step-by-step example is the following: a marshmallow in a stick that would be roasted with time. We're not focusing in what animation would be the best for this, only in the texture and script work.
The marshmallow will travel through three stages: not cooked, partially cooked, roasted. After a time that we would decide depending on the animation timing, this cycle starts again: not cooked, partially cooked, roasted.
This means that our example has three states: not cooked, partially cooked, roasted. We have to decide how long each state will last. For example, if the animation lasts 50 seconds, we can make the not cooked state last for 10 seconds, the partially cooked state last for 25 seconds, and the roasted state last the remaining time (50-25-10, which is 15 seconds)
After deciding how long each state lasts, we have to create appropriate textures for each state. Baked textures are included for this example:
- [Black Tulip] SAMPLE - Marshmallow State 0 - BAKED
- [Black Tulip] SAMPLE - Marshmallow State 1 - BAKED
- [Black Tulip] SAMPLE - Marshmallow State 2 - BAKED
Rez the [Black Tulip] SAMPLE - Marshmallow object. It comes with the [Black Tulip] SAMPLE - Marshmallow State 0 - BAKED texture pre-applied. The first thing we're doing is changing its description field to this value:
t;marshmallow
t; is the special part that tells the script "this is a prim where I'll change the texture", marshmallow is the name you wish to give to it.

IMPORTANT: Each prim MUST have a DIFFERENT description. If you need the same word, consider adding numbers to the end to differentiate them. If you use the same description in several prims, only one of them will change the textures, the rest will remain unchanged.
Make a copy of the [Black Tulip] Timed Theme Texture Change for Props ~CFG~ notecard. Clean it up so it looks like this:

The attachment = 1 line is indicating that this is an attachment, not a rezzed prop. If we want a rezzed prop, we write this instead:
attachment = 0
Drop the [Black Tulip] Timed Theme Texture Creator for Props - AUX TOOL script into the Content tab of the marshmallow sample object:
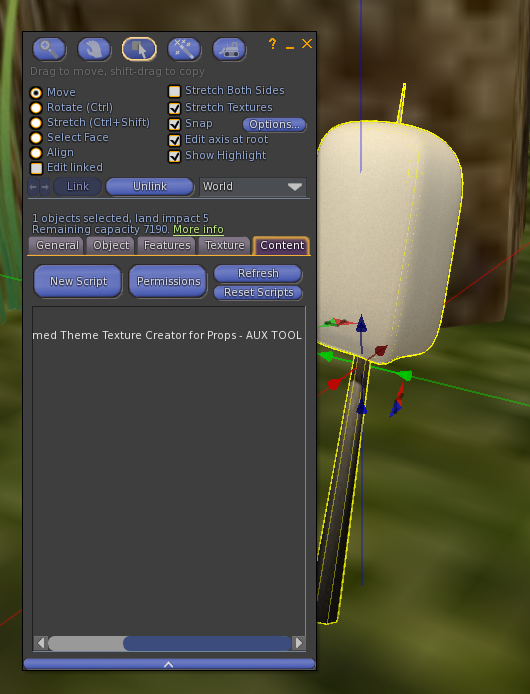
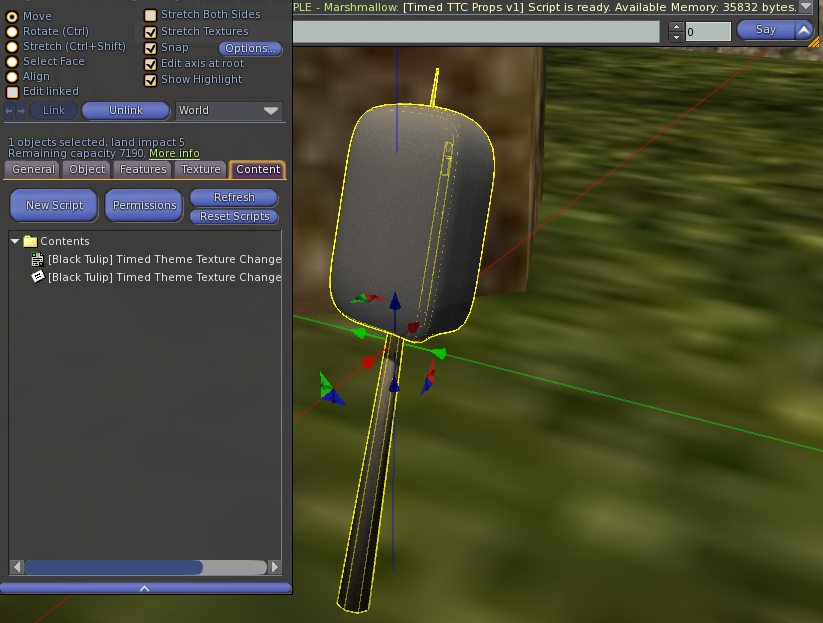
We get a message like this one in local (nearby) chat:
That means the script is ready to work. Click on the object. We get the following menu:

Click on Create!. This outputs text to local chat, this way:

Copy the relevant text to the notecard, this way, cleaning up timestamps:

Now, remember we said that the initial state would last 10 seconds? Then we add the following line AFTER all of the texture data:
time = 10
The notecard should look like this:

Now we apply the [Black Tulip] SAMPLE - Marshmallow State 1 - BAKED texture to the sample object. It looks darker, it's in the "cooking" state:

We bring up again the menu and click Create!. Remember the time this second stage would last? 25 seconds. So we put together the chat output:

and the time=25 line together in the notecard, like this:

And now we repeat with the [Black Tulip] SAMPLE - Marshmallow State 2 - BAKED texture and the remaining time=15 seconds.

When we're done, we can select the [DELETE] option from the auxiliary tool menu. This will remove the script. Now the marshmallow is empty, ready for the final step.
The final step consists in this:
- Edit the marshmallow object, click on the Content tab. Drop the [Black Tulip] Timed Theme Texture Change for Props ~CFG~ notecard.
- Drop the [Black Tulip] Timed Theme Texture Change for Props script in the Content tab of the marshmallow.
Ready! Now you can take the marshmallow in inventory and wear it to see it change. A sample [Black Tulip] SAMPLE - Marshmallow - READY is included (with different timing than the one we've set up).
TIP: If we don't want that the textures take a moment to load when the state changes, we can use a small cube with the textures preloaded in it (or more than one, depends on how many textures we need). We make this cube transparent (by raising the transparency to 100), link it to the marshmallow (the marshmallow being the root), and ready to go.
Advanced Setup
The advanced setup consists in extra bits about the description format and the full configuration notecard format.
Description Format
The description format allows for the # character as a separator, so you can use this script in conjunction with other scripts. For example, you could want to have a prop with light whose texture changes. You can have both scripts working together as long as you use the # character to separate each description block.
Notecard Configuration in Detail
The notecard format is very simple. At the top we include the line attachment = N where N can be either 0 (not an attachment, that is, a rezzed prop) or 1 (an attachment). Then we include the pairs:
Texture Line 1
Texture Line 2
time = M
where M is the number of seconds for the above texture to remain on the object, before jumping to the next state.
Advanced Sample Object
How would we go about the following? A glass that begins full and ends up empty in, say, three steps. This means we have four states: full, empty, and two intermediate semi-full steps.
Depending on how many faces you're using, you may have one item, or several item. We've decided on several items, each one with a separate state. This would make for a (possibly) high LI object if the prop is to be rezzed, but it's not a problem if the prop is to be attached. The advantage is that it makes simpler to set up an already complex object.
Rez the four provided sample objects:
- [Black Tulip] SAMPLE - Glass - 01 - Empty
- [Black Tulip] SAMPLE - Glass - 02 - SemiFull 1
- [Black Tulip] SAMPLE - Glass - 03 - SemiFull 2
- [Black Tulip] SAMPLE - Glass - 04 - Full
They come already textured with:
- [Black Tulip] SAMPLE - Glass - 01 - Empty - BAKED
- [Black Tulip] SAMPLE - Glass - 02 - SemiFull 1 - BAKED
- [Black Tulip] SAMPLE - Glass - 03 - SemiFull 2 - BAKED
- [Black Tulip] SAMPLE - Glass - 04 - Full - BAKED
in order to simplify the example. You would need to texture your own glasses if you make them. Now give to them, in that order, these descriptions:
- t;glass1
- t;glass2
- t;glass3
- t;glass4
Link the four glasses. Create four rows of duplicates so you have five rows of them. Do NOT link them! They must be FIVE separate object. The main one will remain unchanged until we drop the final configuration notecard and script. The other four are temporary, used to make the process simpler.

Now, let's think of what we want. We want four states. How do those states look like? We begin with a full glass, so that means only the full glass is showing, the other three are hiding. We can drop the auxiliary script in the first row, make all glasses but the full one, transparent:
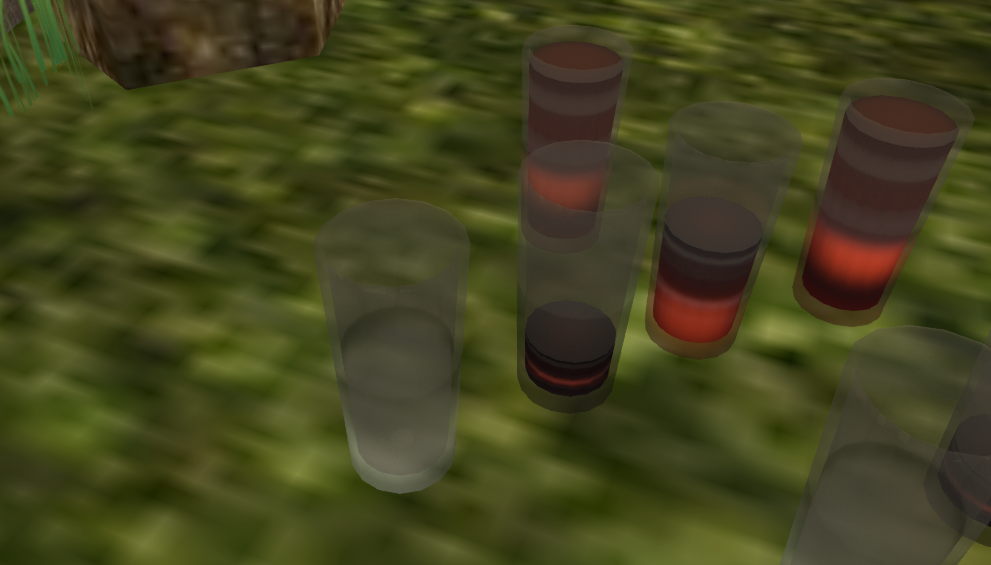
and then proceed to obtain the relevant data for the notecard (observe there's a lot of data because each glass has more than one face):

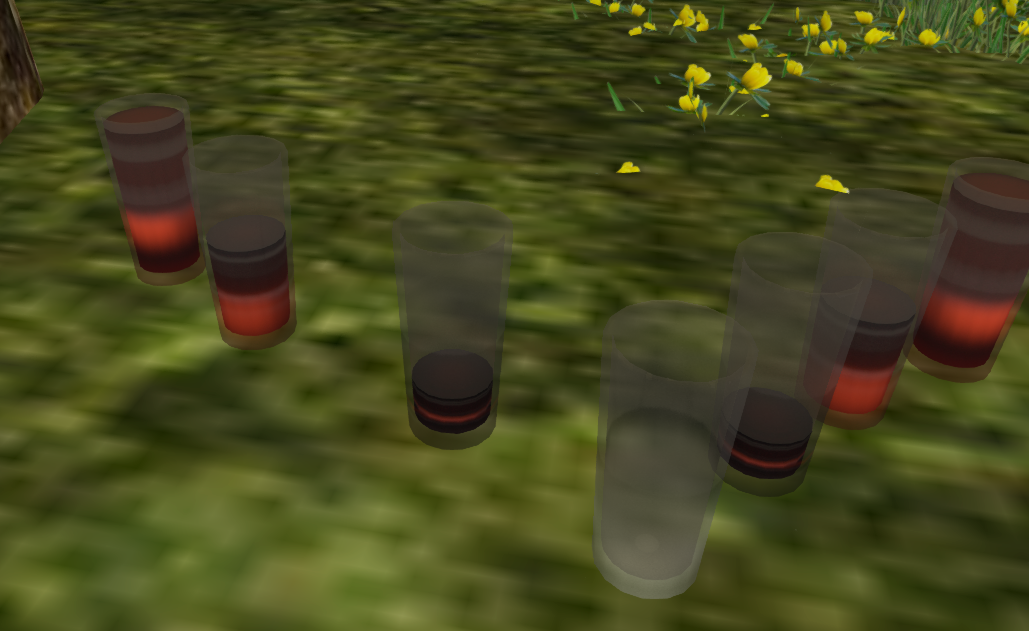
The second state is when the glass begins to empty. So we use now the second row of glasses, make all of them transparent but the one where it begins to empty:

and use the auxiliary tool on this one to get the corresponding data.
The third state is when the glass is almost empty, but not entirely empty. We use the third row of glasses, making all of them transparent except the one that is almost empty:
then use the auxiliary tool on this one to get the data. Finally, the fourth state is when the glass is empty, so we use the fourth row for this:

and the auxiliary tool to retrieve the data.
We can now delete those four rows of auxiliary glasses, and focus on the main one, which still remains with all textures intact.
Now we need to have all the glasses occupy the same position. When designing the meshes we've already taken care of details like, they must all have the same size. Making all the prims of a linked object occupying the same position should be an easy task with a viewer like Firestorm. Simply decide which glass is your main one (for instance, the full one), and proceed this way:
- Click Edit linked.
- Select the main glass. Click to copy its position.
- Select one of the other glasses. Click paste to paste the position. It moves with your main one.
- Select another one of the glasses. Click paste to paste the position.
- Select the remaining glass. Click to paste the position.
Now we have all the glasses occupying the same position: the user will only see a transition of textures, with time, from full to empty. What's next? Dropping the configuration notecard and the main script into the attachable prop. Then attach it to see the prop in action. The [Black Tulip] SAMPLE - Glass - READY included object shows it.
When Transparent States/Objects are involved.
When changing among transparent parts, you may want to alter manually the order in which the script will change the textures, by modifying the notecard. Look for the description of that object, and cut/paste those snippets first. Else, the process may show the prop transparent for a second or two, which is an unwanted side effect. The glass shows this unwanted effect on purpose, to make you aware of it. You can fix it by altering the notecard.
The included [Black Tulip] SAMPLE - Glass - READY & FIXED object contains a notecard that improves the above explained situation.
Troubleshooting
Q: I've given descriptions to several prims, but some of them don't change. What's wrong?
Remember this, from the documentation:
IMPORTANT: Each prim MUST have a DIFFERENT description. If you need the same word, consider adding numbers to the end to differentiate them. If you use the same description in several prims, only one of them will change the textures, the rest will remain unchanged.
This means that the likely problem is that you have two descriptions (or more) being the same. You will need to redo the themes when fixing this issue.
If after having followed the directions and checked the troubleshooting list, you have problems making the script work, please click here for the customer service form.