Script: Bathtub BASIC and FULL AVsitter plugins
Documentation · Bathtub BASIC and FULL AVsitter plugins
Bathtub BASIC AVsitter plugin script in Marketplace.
Bathtub FULL AVsitter plugin script in Marketplace.
Thank you for having considered this script to enhance the quality of your products. Please read the following instructions carefully, especially the ones explaining which permissions to apply to the scripts for the next owner. Failure to complete this task INVALIDATES the license governing your use of this set of scripts. Should you have problems, please fill the scripts assistance form, explaining what you did and what happened, and I'll get back to you.
IMPORTANT! The script contains a check to prevent accidental give-aways. If you haven't set permissions correctly in your inventory, then the script will self delete when you try to use it. The best way to ensure you set permissions correctly is by doing it NOW in your inventory.
Follow these directions carefully. Complete the Step by Step Guide in the first place and then go to the Advanced Setup section for a detailed explanation of all the features. There's a Troubleshooting section at the end. Before asking for help, check that your problem isn't one of the problems described in there.
License of Use: Click here to read the License of use.
What's included in your purchase
Check that your box contains the following assets:
Basic version:
- [Black Tulip] Bathtub - BASIC - AVsitter Plugin
- [Black Tulip] Bathtub - BASIC - AVsitter Plugin ~CFG~
- [Black Tulip] Bathtub - BASIC - AVsitter Plugin ~DOC~
- [Black Tulip] Proof Of Purchase - Bathtub Basic Plugin v1
Full version:
- [Black Tulip] Bathtub - FULL - AVsitter Plugin
- [Black Tulip] Bathtub - FULL - AVsitter Plugin ~CFG~
- [Black Tulip] Bathtub - FULL - AVsitter Plugin ~DOC~
- [Black Tulip] Proof Of Purchase - Bathtub Full Plugin v1
- [Black Tulip] Water Particle Effect - Bubbles
- [Black Tulip] Water Particle Effect - Steam
and these sample assets, necessary to follow the step-by-step guide:
Basic version:
- [Black Tulip] Bathtub - SAMPLE - Start here
- [Black Tulip] Bathtub - SAMPLE - BASIC - Finished
Full version:
- [Black Tulip] Bathtub - SAMPLE - Start here
- [Black Tulip] Bathtub - SAMPLE - FULL - Finished
If any of these is missing, contact Auryn Beorn for a replacement. Keep in mind that sample assets are never provided in full perms state. They're included to illustrate how to use the script.
Features list
- Sit on the bathtub, have the water automatically turn on
- Faucet opens for a few seconds as the first avatar sits on
- Show/Hide the water
- Choose a water sound to play from a maximum of nine
- Change the sound volume
- Access menu
- Have steam particles (full version only)
- Have bubbles particles, for example for a jacuzzi (full version only)
Step by Step Guide
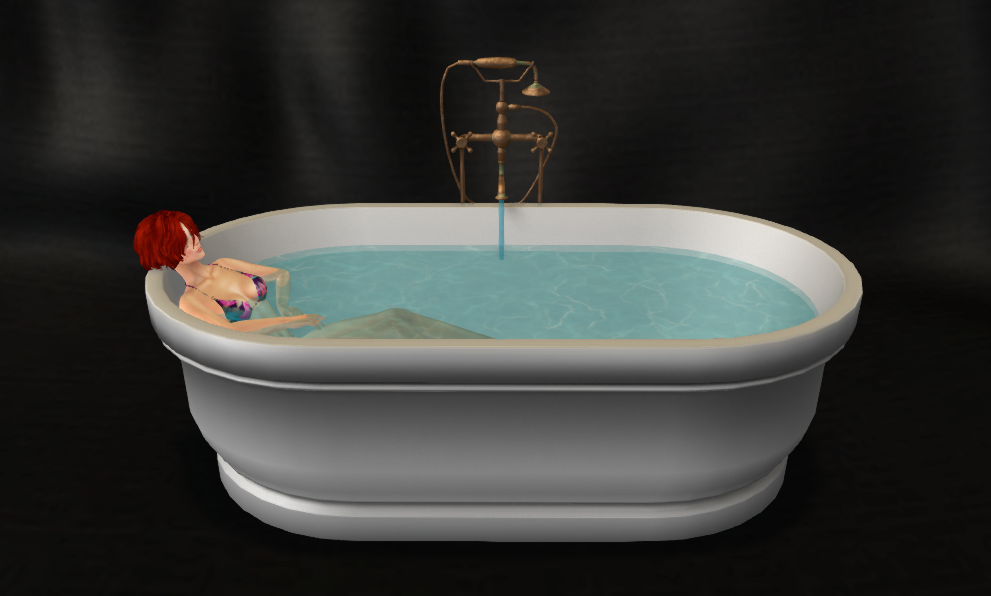
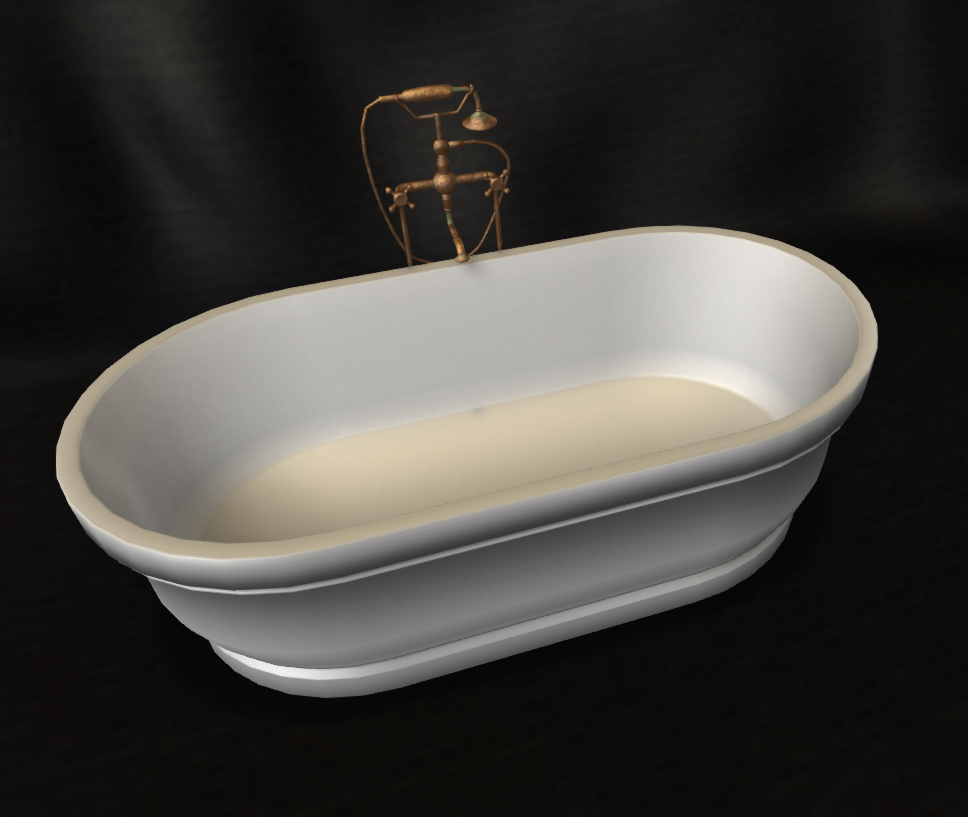
Rez the [Black Tulip] Bathtub - SAMPLE - Start here sample object. It contains one animation with AVsitter and a few sound clips (no transfer). You can sit on it while preparing the item and be comfortable if you wish :-)
We have to begin by deciding:
- Which prim(s) will be the water covering the bathtub
- Which prim(s) will be the faucet(s)
With our sample object, the choice seems quite clear. The big blue prim is the water covering the bathtub, and the small cylinder coming down the faucet is the faucet water. So let's go into edit mode, edit the bathtub with Edit Linked ticked, and identify the prims:

This one is clearly the water that will cover the bathtub, so let's change its description to water, as the picture shows:

Later we'll add something more to the description, but let's start things easy. Now we identify the prim with the faucet water:
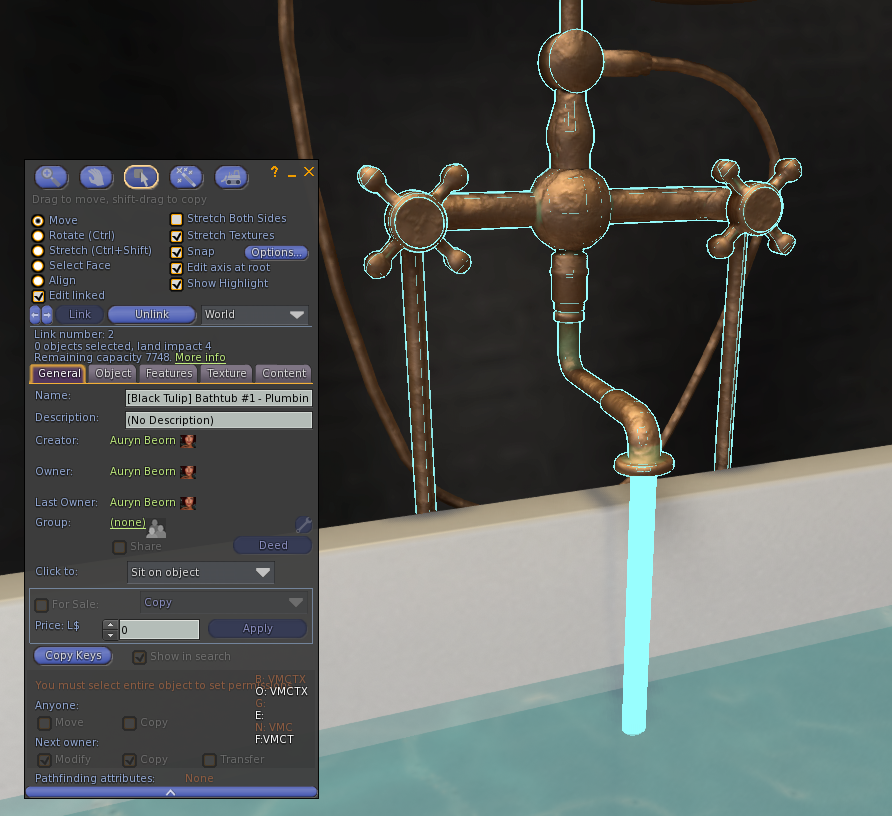
and give it the description faucet. Just like before, later we'll add something more to the description, but for now let's make things easy.

Now let's worry about some extra information. In both cases, we're working with animated water. The script needs to know in which face that water is, and how to animate it. To make things easy, let's change the descriptions this way:


and in the advanced setup section we'll explain what all of this means. What we need to know now is that they're setting the correct animation parameters, including which face to animate (essential in the faucet prim, for it has two faces), and the last value is the transparency value of the animated water when it's visible.
We've taken care of the water. Now we want to take care of the sounds. We must answer three questions:
- Which sound will be used as faucet sound?
- How long (in seconds) will be the faucet open as the first avatar sits?
- Which other sounds we'll make available as bathtub sounds?
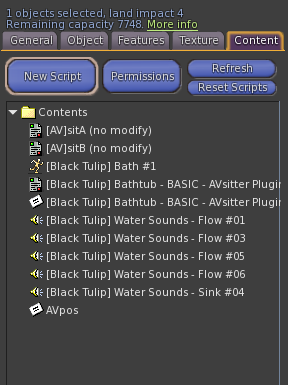
In our case, the faucet sound will be the sample included in the bathtub object, [Black Tulip] Water Sounds - Sink #04, and it will have a duration of 20 seconds. This is reflected on the [Black Tulip] Bathtub - BASIC - AVsitter Plugin ~CFG~ configuration notecard this way:
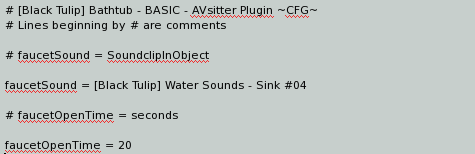
Notice that after faucetSound we've written [Black Tulip] Water Sounds - Sink #04 . This is the name of the sound clip that must be in the prim with the scripts. Then the line:
faucetOpenTime = 20
means that the faucet water and sound will last 20 seconds. You can make this longer or shorter, but keep in mind that the script will allow a maximum of 60 seconds. Else the effect stops being believable and can seriously annoy the avatar using the bathtub.
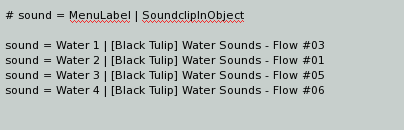
Now let's look at how the sounds section is written
Focusing on the first line:
sound = Water 1 | [Black Tulip] Water Sounds - Flow #03
this means that when the avatar accesses the sounds menu, they will see Water 1 as a button name, and the [Black Tulip] Water Sounds - Flow #03 soundclip will be played in loop. The sound clip must be in the prim with the scripts.
With all this, we've set up the basic version! Now stand up from the bathtub and drop the two following assets, in order (make sure you've changed the permissions for next owner to the script!)
- First we drop the [Black Tulip] Bathtub - BASIC - AVsitter Plugin ~CFG~ configuration notecard.
- Then we drop the [Black Tulip] Bathtub - BASIC - AVsitter Plugin script and wait for it to load the notecard.
Notice how as the script finishes reading the configuration, the bathtub automatically hides the water:
Now we need to alter the AVpos notecard, this way, so a button shows under its [ADJUST] menu and we can access to the bathtub menu:
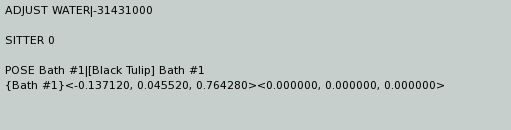
Once AVsitter loads, we can sit on the bathtub.

Squeeee! The sample [Black Tulip] Bathtub - SAMPLE - BASIC - Finished object will serve you to compare yours, in case you don't manage to set up this sample bathtub. Pay attention to little details like the ; character which at times can be confused with a dot . and also make sure there are no extra spaces.
This is all if you have the BASIC version of the script. If you have the FULL version, you can also add two particle effects: steam and bubbles. The configuration notecard is already prepared, so let's see how to configure the prims to have this working. Free textures have been included: Remember to change permissions for next owner to them!
We would set up the bath tub just like we've done in the BASIC version, and now we prepare it for the particles, so we're assuming the bathtub has the descriptions and notecards (AVpos included) ready.
Steam
Steam usually comes from the water, so we can make our water prim a source of steam. On one side, we need to indicate this in the prim description. Notice the format and the # character separating the steam keyword from the water texture data description:

Then we will drop the particles texture in the water prim, with permissions for next owner correctly changed:
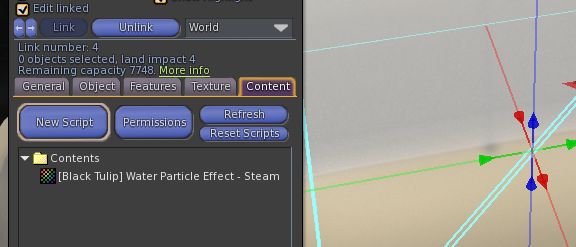
And then we drop this same texture (permissions changed) in the ROOT PRIM, with all the scripts.
Done with this? Let's go and add some bubbles.
Bubbles
Bubbles can come from many sources. We will rez a box for each of them, place the boxes where we like the effect to be, link them to the main build, and once done, make them transparent. For the sake of simplicity, we'll add only two boxes. We'll make them tiny and position at approximately the same height the water prim is:

Then we will texture one of the boxes with the two particle textures. This trick will preload the textures, so your customers won't see gray textures when the effects start before the textures completely load:
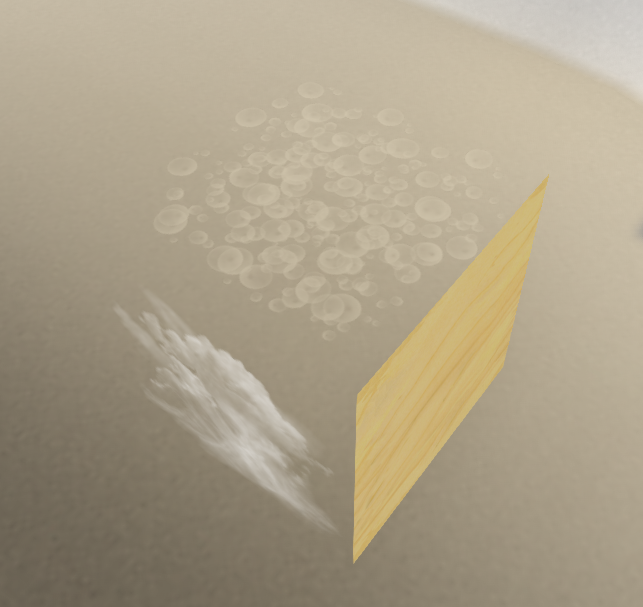
We drop the corresponding particles texture to EACH of the boxes (with permissions set correctly):

and we type the following description in them:
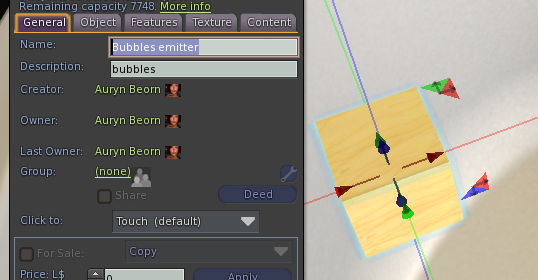
Then we link them to the bathtub, make them completely transparent (set transparency to 100), and drop the particle texture in the ROOT PRIM, with the other scripts and assets:

Now all that is left is to drop these assets in order:
- First we drop the [Black Tulip] Bathtub - FULL - AVsitter Plugin ~CFG~ configuration notecard.
- Then we drop the [Black Tulip] Bathtub - FULL - AVsitter Plugin script and wait for it to load the notecard.
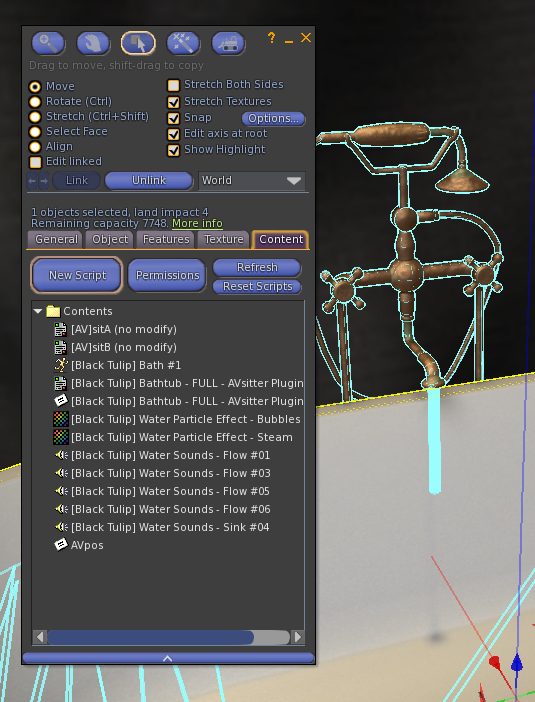
We're assuming the AVpos notecard is already modified with the same ADJUST code we saw in the BASIC case, so we sit on the bathtub:

Squeeeee! (Take two).
Your steamy bath is ready :-)
Advanced Setup
For the sake of simplicity, we've skipped some explanations while saying "write this, do that". In this section, we explain the meaning of those parts we skipped.
Description Format
Whenever we want an animated texture, we have to tell the script:
- The type of texture animation
- The speed (low numbers for a slow animation, high for a faster animation)
- In which face the animation should play (or if it should play in all the faces at once)
Apart from this, when we want a cell animation, the script needs to know how many vertical frames (we call this x) and how many horizontal frames (we call this y) the texture contains.
To avoid entering into technical details that may confuse at this point, let's just see the description format when we want animated textures as water, and then a couple of very common examples that, most likely, will be the ones you will use :-)
General format:
water;code_for_animation_type;x;y;speed;face;transparency
water
This is the code word for the script. Write it as is. Case sensitive!
code_for_animation_type
If you use a cell animation: 3
If you use a slide animation: 19
x
If you use a cell animation: you type here how many VERTICAL frames the animation has
If you use a slide animation: you type here the number 0
y
If you use a cell animation: you type here how many HORIZONTAL frames the animation has
If you use a slide animation: you type here the number 0
speed
Here you type the frames per second to show (if cell animation), or the speed the animation will slide
face
-1: The animation will be applied to ALL THE FACES of the prim
face_number: The animation will be applied to the face face_number of the prim (you type here the face number!)
transparency
A number between 0 and 1 indicating how transparent the water will show when it's activated.
Examples
water;3;4;4;9;-1;0.6
This is a cell animation (code 3) having x = 4 vertical frames, y = 4 horizontal frames. The speed is 9 frames per second. It will show in face -1, which is the code for ALL THE FACES of the prim. 0.6 at the end is the transparency.
water;19;0;0;0.1;0;0.6
This is a slide animation (code 19), so in both x and y we type the number 0. The speed is 0.1. It will show in face 0 of the prim. 0.6 at the end is the transparency
It is very important to indicate the face! Nowadays, it's very likely that we will use a multi-face mesh, and we want to animate only one face in that case, not the whole mesh! :-)
(Why just one or all faces? This is a scripting limitation. The animated texture can work only in all faces at once, or in just one of them. If you hear otherwise than one-or-all at once, it's true that there's a trick, but it's not a reliable one, and may get "fixed" by LL at any time!)
Notecard Configuration in Detail
Troubleshooting
If after having followed the directions and checked the troubleshooting list, you have problems making the script work, please click here for the customer service form.